My Blinkie

My Forum

Thursday, March 29, 2012
New Template - EI#87

Thursday, March 22, 2012
Tag Showoff - Zlata M
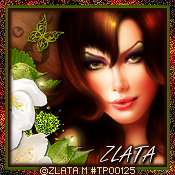
Okies I am pretty sure you all already know this fabulous artist!
And if you don't It's Zlata!
Weeeeeeeeeeeeeeee
I just had to use this tube. She has a few layers to her to really help create the perfect image for any project!
Plus Zlata's work is already gorgeous and speaks for it's self so it's easy to work with!
This tube I got from - The Psp Project!
Swing by and check them out. Zlata has some gorgeous pieces over there already and I know you will just love them all!
I hope you all have liked what I made.
I might be back with a matching tag with extras for you all to snag as well.
Weeeeeeeeeeeeeee
Lot's of love,

Tag Showoff - KR Drawings
Ok I can not believe I forgot to post this beauty to showoff to you all. I could have sworn I did already too. Eeeeek Shame on me!
I made this set using the gorgeous work of KR Drawings
You can visit her site her to check out all her beauties - KR Drawings
Also to visit where she sells her tubes make sure you swing by - The Psp Project
She has gorgeous pieces of there I know you all would love.
This piece I used really inspired me to create the vintage look with her. She screamed soft yet deep colors. I think the colors really helped make this already beautiful piece pop yet suttle as well.
I hope you all liked what I made!
Thanks for checking it out, Huge Hugs xoxo,
Monday, March 5, 2012
BAG - A - SNAG SHOWOFF TAGS
Hi there all
I just wanted to showoff some of these wonderful tags that were made from talented ladies in my forum Bag - A - Snag
I asked if any of them had played with my newest templates #81 - #86 and i was so excited that they did! YAY
So I just had to show them all off to the world.
I would like to say a huge Thank you to all of you who had played with my templates. It means alot to me that you do and helps inspire me to create more.
You all are amazing! Huggies xoxo
Without further ado, here are the gorgeous tags these wonderful ladies made:
Debbie made these beauties below:
With Template #85

With Template #83
With Template #82

With Template #86

With Template #81

Pammy made these beauties below:
With Template #83

With Template #80

Silkee made these beauties below:
With Template #86

With Template #83
Patti made this beauty below:
With Template #81

Woooooohoooo didn't they do a fantastic job!! I am so proud of these girls
and so honored. Thanks again ladies for playing with my temps!
You all might have to click on the tag itself to see full size!
Hope you all likes what they made too.
Lot's of love,
Sunday, March 4, 2012
New Tut - Lady Of The Night

Lady Of The Night
This tutorial is a self expression of my work. Was written using PSP9! Any similarities out there is a quinkydink. lol
Also written With assumption you have full knowledge of a Psp program and all it's tools.
Filters you will need:
Also written With assumption you have full knowledge of a Psp program and all it's tools.
Filters you will need:
Eye Candy 4000 - Gradient Glow, HSB Noise
Supplies you will need:
This gorgeous tube by Corlen Scope called - Red Lady
To visit her site go here - Corlen Scope
You can purchase the tube over at The Psp Project as well as other works too. - The Psp Project
My word sheet here - Download
Fonts I used - FFF Urban (CR INFO), Euphemia
Cityscape - The one I used is from a kit called - Rocker by Tamie from Addictive Pleasures.
You can purchase the tube over at The Psp Project as well as other works too. - The Psp Project
My word sheet here - Download
Fonts I used - FFF Urban (CR INFO), Euphemia
Cityscape - The one I used is from a kit called - Rocker by Tamie from Addictive Pleasures.
To visit her store go here - Dreams N Digital
But you can use whatever you find.
Let's get started!
Open a new 650x200 Transparent canvas. Flood fill Black!
Also open up a new 175x175 transparent canvas. Flood fill Black.
Minimize the smaller canvas for now.
Let's start with the frame 1st.
On your black canvas:
Go to Selections/Select All.
Then Selections/Modify/Contract
Add these settings:

Then go to Selections/Invert
Add a new raster Layer. On this layer flood fill your selected layer with a color of choice. I chose to use black.
Deselect. If you need to x out your black layer to do this that's fine, that way you can see it better.
Now Go to Eye Candy 4000/Gradient Glow and apply these settings with a color of your choice.
I used a red - #650202.
Do this 2 times total.
Now Add Drop Shadow - Effects/3dEffects/Dropshadow:

Now go back down to your black flood filled layer again.
Go to Selections/Select All
Then go to Selections/Modify/Contract
Add these settings:

Now add New Raster layer and bring this layer above your black border frame
now your gonna make a gradient with 2 colors
I chose a dark red and a lighter red
dark red - #2f0200
light red - ##980304
Go to Gradient on your color palette and apply these settings:

When done flood fill your selected area with your gradient.
Deselect.
Now on this same layer I want you to go to Eye Candy 4000, HSB Noise and apply these settings:

Now Add same dropshadow as before.
Now Here is where I added my CR info to the tag, I used font FFF Urban, size 6, no bold.
You might need to adjust the font, if it looks blurry just add a space bar to it after the name and it should clear it up.
Capital letters! Font color - White
Convert to raster and Add a gradient glow 1 time to it. Same glow color as before.
Now we are done with the border. YAY
Avatar:
Open your avatar canvas, now do exactly the same thing to this as you did with your banner.
All the same settings and everything. lol
Back to Banner:
Now I want you to copy and paste your close up tube as a new layer.
Place on the left side of your banner. Resize if you need to
Duplicate
On your duplicate layer go to Adjust/Blur/Gaussin blur and apply these settings:
Now I want you to copy and paste your close up tube as a new layer.
Place on the left side of your banner. Resize if you need to
Duplicate
On your duplicate layer go to Adjust/Blur/Gaussin blur and apply these settings:

Now on your layer's Blend Mode set it to Overlay.
Now Lower the Opacity levels to 40 on both layers of your tube.
On the non blurred tube layer go to
Effect/Texture Effects/Blinds and apply these settings:

Now Copy and paste as a new layer the wordart I provided and place slightly center a bit over your closeup tube.
Now on the Blend mode switch it to Multiply
Now take your Rectangle tool Background color only on your palette and draw a small rectangle across
your banner. See my tag for reference, make sure its big enough to add your name in it.
Convert to Raster.
Now add the same Gradient Glow Settings you used before on your border and apply it
twice to your rectangle. Add Same drop shadow too.
Copy and Paste your Cityscape element as a new layer and drop this below
your rectangle layer you just made. Adjust to the right of your Banner.
See tag for reference.
Now with the font you used for your CR i used also for the wordart on the bottom of the banner.
i used the same settings and everything just a different color and add the text you like.
mine was Super Villian or Super Hero? lol
Color I used is - #980304
Now I want you to copy and Paste your Tube as a new layer.
Place how you like on your banner, see mine for reference.
When you have it to where you like, I want you to duplicate
On your duplicate layer go to Adjust/Blur/Gaussin blur and apply these settings:
Now on the blurred layer set your Blend mode to Overlay. You will see it brightens the tube up.
On the non blurred tube add a dropshadow if you like.
Now here is where i added the name.
on your rectangle layer i want you to add your font above that layer.
I used Euphemia/Size 12/Bold Selected
Color White. Convert to Raster.
Now Bring your Border layers and CR layer to the top of all layers.
make sure your CR layer is top layer
Your color Border is after that, then your solid border.
Now make sure all layers are un Xed.
I want you to go to your crop tool, and click this button:

Its on the upper of your screen.
Now double click on your tag quick. This is just to make sure both layers will be the same size and even
And Wala you are done with your banner so far.
Avatar:
Now since we already got the borders for this out of the way
Go and copy and paste your tube as a new layer.Place how you like or you
can look at my tag for reference.
Duplicate
On your duplicate layer go to Adjust/Blur/Gaussin blur and apply these settings:
Go and copy and paste your tube as a new layer.Place how you like or you
can look at my tag for reference.
Duplicate
On your duplicate layer go to Adjust/Blur/Gaussin blur and apply these settings:
On your blurred tube layer set your blend mode to Overlay.
Now Copy and paste your cityscape and place below tube layers, resize if you need to.
Place how you like again.
Copy and paste your rectangle from your banner to your avatar as a new layer.
Place below tube layers. See tag for reference
I also copied and pasted the wordart i did and added it to the bottom of my avatar. See for reference.
Add your name.
Now bring your Border layers and CR layer above all as you did for your banner.
Now save as a PNG and your done.
Add your name.
Now bring your Border layers and CR layer above all as you did for your banner.
Now save as a PNG and your done.
Now if you would like to animate your banner, Let's continue.
I hope this doesn't sound too difficult, I am not the best at explaining animation, but this is what I did
On your black background layer i want you to take your Magic wand and draw out a rectangle section of your banner
Start with the middle and draw out till it all the way to the right end of your banner.
You should now have a selected area.
On your black background i want you to hit delete. Yep clear it out, cause you got to do something first before we add animation.
Take this half black layer and bring it up to right below your closeup tube layers.
Now Xout all layers except:
The half black background
Your closeup tube layers
The Lady of the night wordart I provided
The Cityscape
and The rectangle you made.
and the small wordart you made along the bottom of your banner.
Now merge visible.
The reason i had you all do this is so it keeps the same look.
If you didn't do this all your opacity and blend modes you did wouldn't have
stayed the same.
Now I want you to X out all layers you have
except your borders layers
Cr layer
and Main tube layers
Merge Visible
Now you can Un X everything
Now Add new raster layer and flood fill black
bring this all the way to the bottom.
Take your magic wand tool again and draw out the same size rectangle you did before on it.
But now take your black layer and duplicate it 2 times for a total of 3 layers.
On each black layer i want to apply this
Eye Candy 4000/HSB Noise
Add this setting to your 1st black layer:

Now on the second black layer add same effect but just hit the random seed button once
then do it again on your 3rd black layer
Deselect
You should now have 3 black layers with the effect on each, but different randoms.
Wooohooo you all still with me? lol
We are almost done.
Now what I did here is
On my borders/tube/cr layer I duplicate 2 times for a total of 3
On my closeup/cityscape/wordart layer I duplicate it 2 times for a total of 3
and My name layer I duplicate it 2 times for a total of 3
now X out all the copied layers you just made
You should have 1 layer of each section:
Effect Background
Closeup tube/wordart section
Name
and Border/Cr section
Merge visible.
X out merge and do it again for your next copy
Merge visible
X out merge again
and last copies again merge visible
You should now have a total of 3 layers of your banner.
un X all layers and save in animation shop format.
Open animation Shop.
Find your saved banner
Open it up and view animation
Hit CTRL A to select all layers
Got to animation/frame properties
And set it to 25
View animation again
It should look like mine.
Weeeeeeeeee now just save and you are all done.
Thank you all so much for taking this journey with me. I hope you all liked and was easy to understand.
lot's of love to you all xoxo
Saturday, March 3, 2012
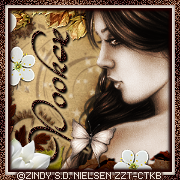
Tag Showoff - Zindy S.D. Nielsen
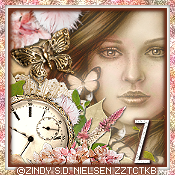
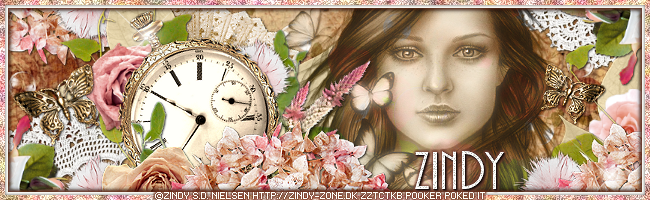
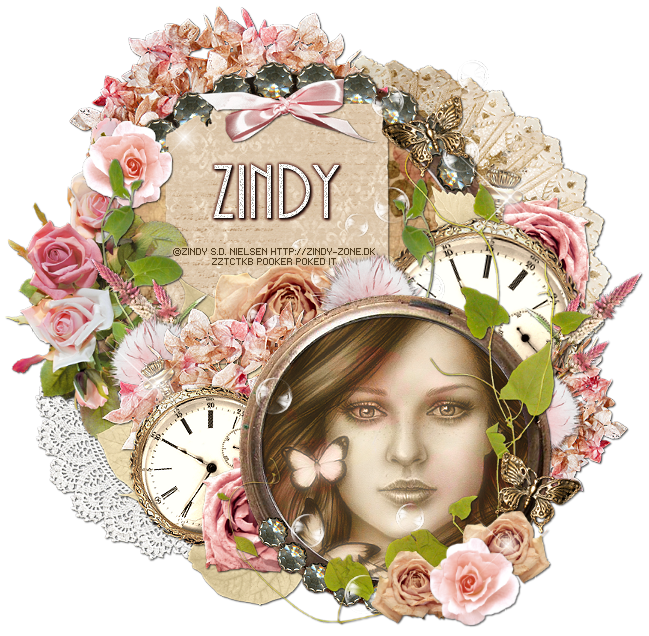
Weeeeeeeeee I can't believe I did a 3 Piece Set! And I am so excited about this one too.
I absolutely adore this tube. I have played with her a few times and I can't wait to play with her again!
This gorgeous tube is called - Unleash The Butterflies
And the Artist of this piece is non other than Zindy S.D. Nielsen! ( I think you all already knew that lol )
Well if you haven't heard of her by now I hope you will all swing by her beautiful store and website. She also has a forum and a Tubes blog for you all to view. So many wonderful things she has provided for us the fans. you all dont want to miss out on the fun and of course the GORGEOUS Artwork!
Here are a few links for you all to visit her at:
To visit her website go here - Zindy-Zone
To visit her store go here - Zindy Zone Shop
To visit her forum go here - Zindy Zone Forum
To visit her tube blog go here - Zindy Zone Tube Blog
Also on her website she has information on other places she is at, so make sure you all check that out to.
She is an amazing person with so much heart and talent. And such a sweetheart. Thank you so much Zindy for being amazing and letting us have fun with your art! Huge Hugs xoxo
Thank you all so much for checking this out, I hope you like what I have made.
Lot's of love,
Tag Showoff - Addictive Pleasures

Wooohooo I have been tagging again, it's been a long while since I have been able to sit down and do this with all my computer mess and stuff. But so far so good everything is getting back to normal. Yay!
Now with this gorgeous tag I did above I was so excited to make my 1st St. Patrick's Day theme tag!
And with the help of one of Tamie from Addictive Pleasures Kit called - Irish Girl.
I fell in love with this kit the minute I saw it. WOW
It totally speaks Patty's Day to a T.
You all got to check out her fabulous store to get it. Come swing on by and you will love what she has to offer over there,
To go to her store go here - Dreams N Digital
To go to her blog go here - Addictive Pleasures
I also used one of my templates below for this tag and thought it was a perfect layout to set it all right. Template EI#82.
Would love to see what you all do with it.
Thanks for checking it out and lots of love,
Subscribe to:
Posts
(Atom)
Fav Blogs

Fav Avatars